
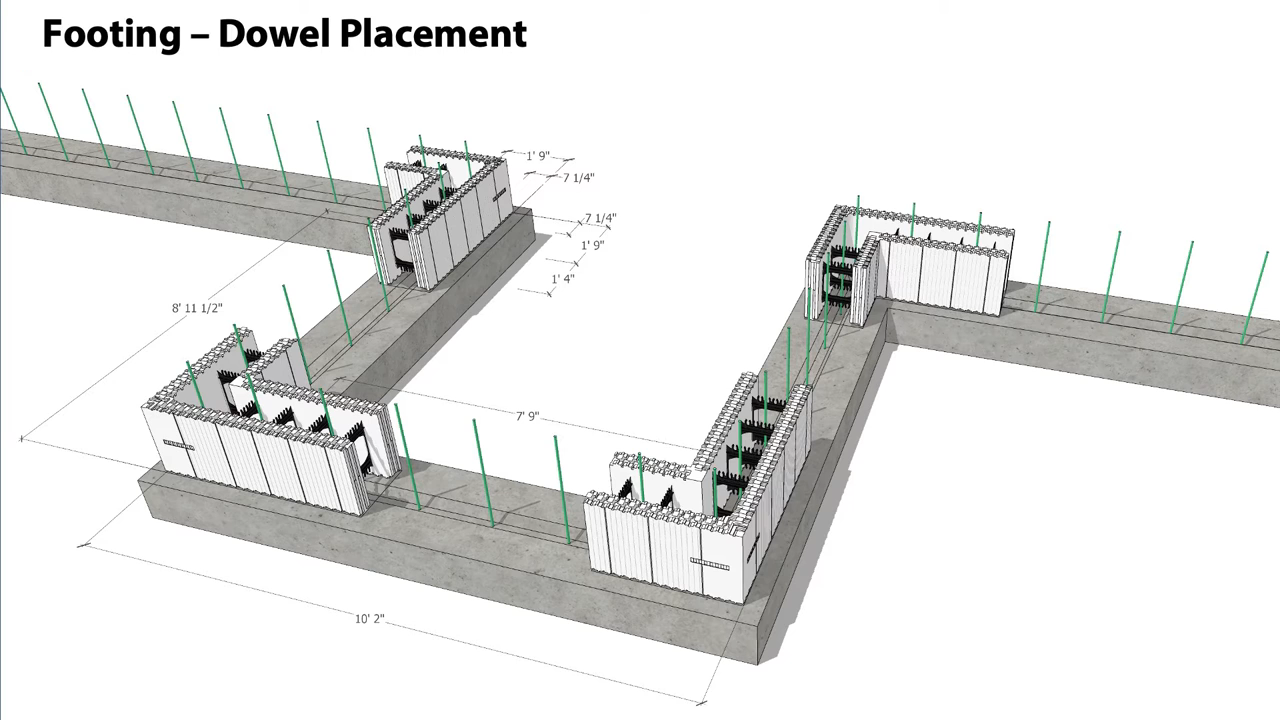
The footing in an ICF build is a continuous footing since the entire wall of an ICF build is a load bearing wall that needs to be continuously supported. For a 2-3 story ICF house with 6 inches thick cores, footing size is prescribed to be 30 by 60 cm footing with four pieces of number 4 (US and Canada) or 12mm (Philippines) rebar reinforcements with stirrups every 30cm. The footing is prescribed to be 1 to 1.5 meter below grade.
Though not commonly practiced in the Philippines, it is prescribed to place a plastic vapor or moisture membrane barrier around your footings and below grade walls to later prevent the capillary action of concrete sucking moisture from below and bringing it up to the walls and floors, and you will wonder later on where all that moisture, algae, and mold come from. We recommend you use ready-mixed concrete from a batching plant since they have concrete that is strictly up to standard and can even be pre mixed upon request with additional waterproofing additives.
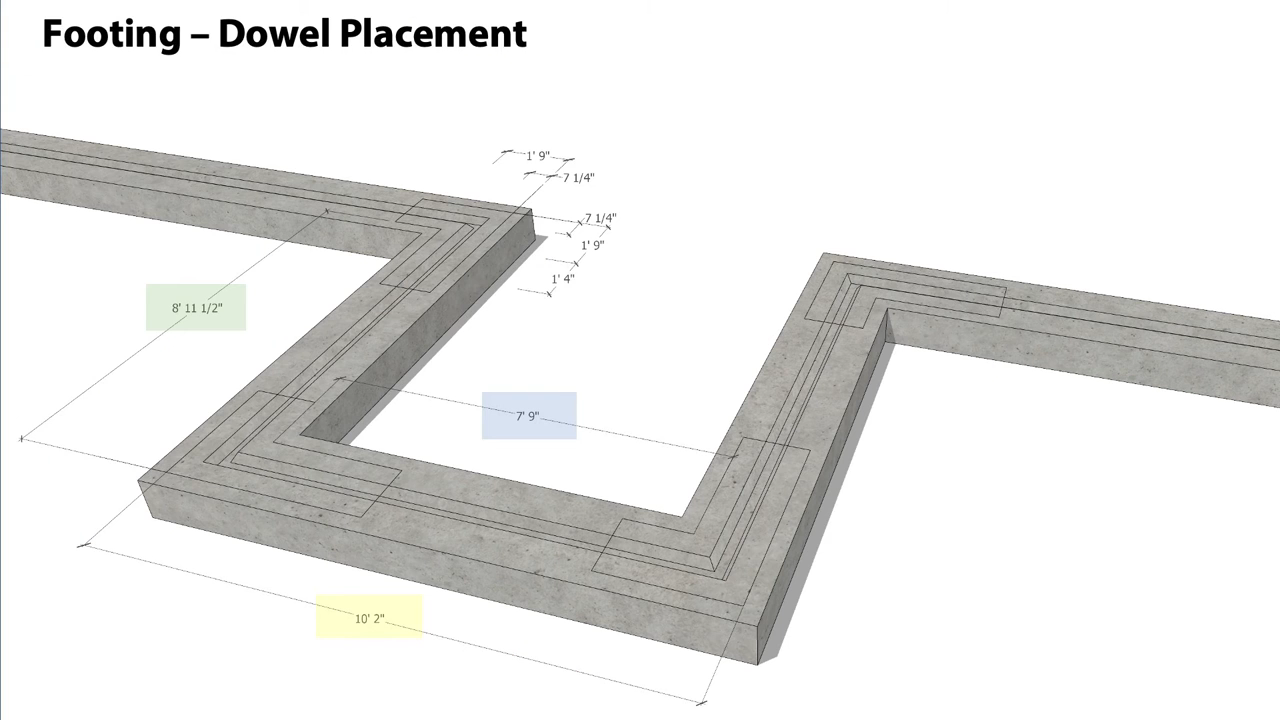
Right after the pour when your footing concrete is no longer as liquid and has started to harden a little bit usually in 2 hours, you can start to “wet set” the bent dowels for your vertical wall rebars. See bent dowels on the next illustration. Your vertical rebar is prescribed to overlap your footing dowels at least 24cm.
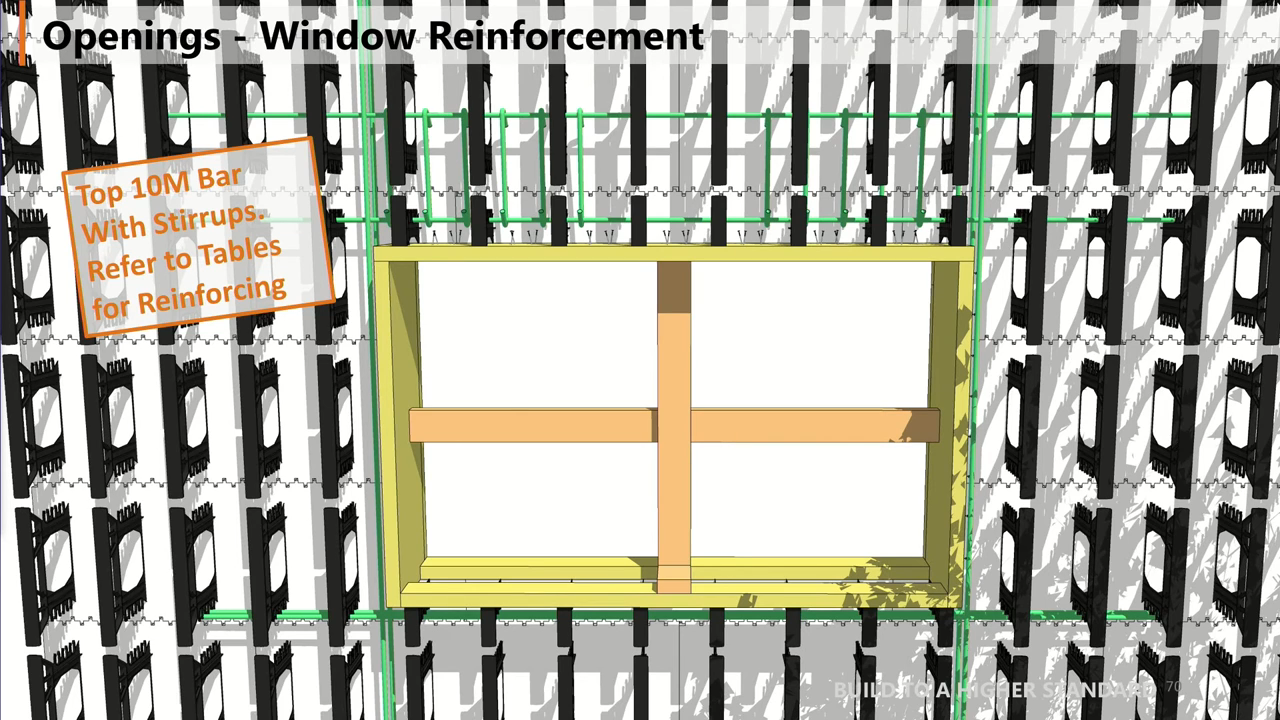
For 2-3 story structures your vertical rebars is prescribed to be 12mm placed every 24 inches, and your horizontal rebar be twin 12mm rebars at every horizontal edge of your ICF forms if you’re your forms are 12 inches in height. Linter stirrups for 2-3 story ICF structure is prescribed to be rectangular made of 4 pieces of 12mm rebars prescribed at 30cm in length and width to fit within the 6 inches cavity with stirrups every 10cm.
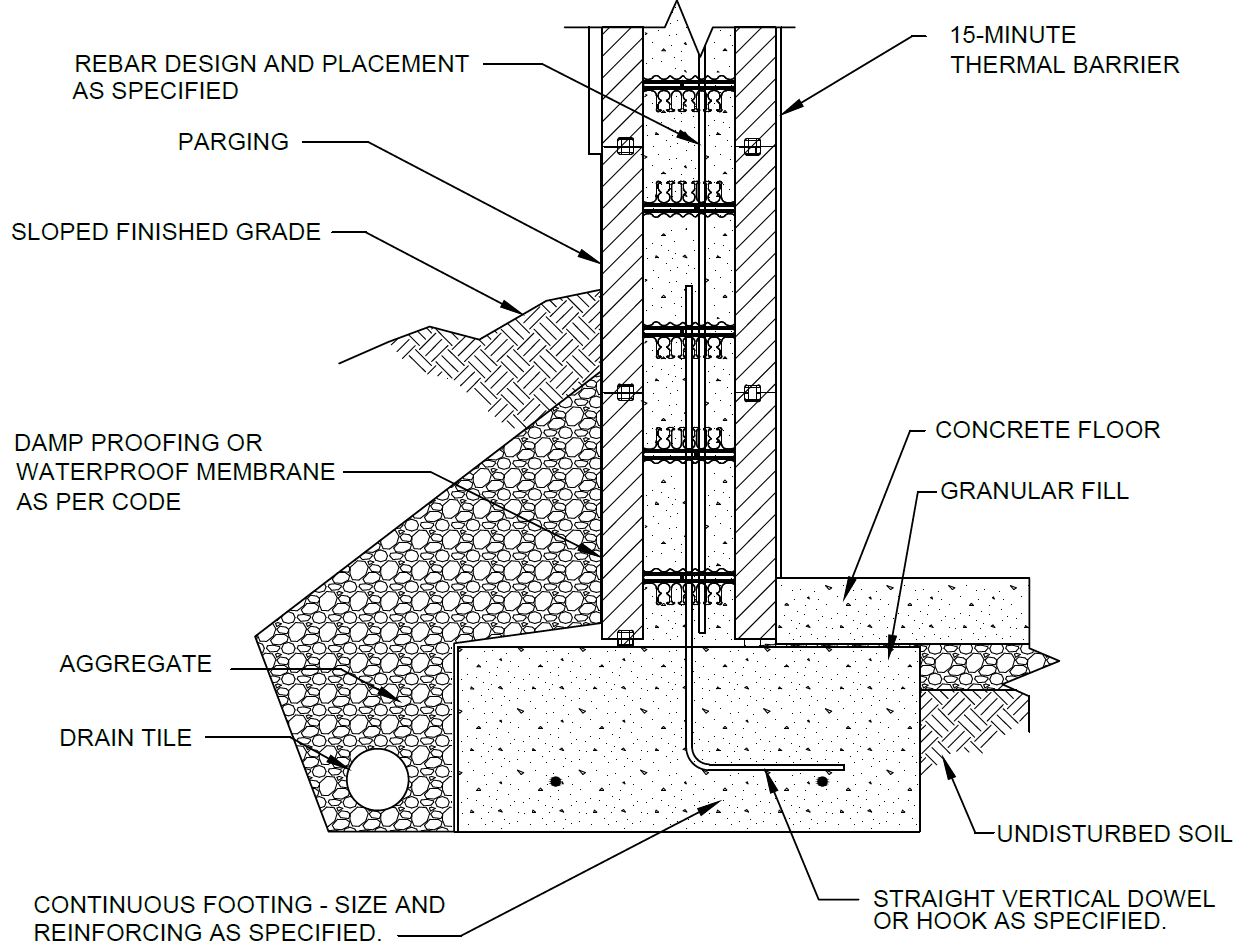
When starting your stem wall – that wall below grade that connects your foundation footing to your above grade walls – we recommend you apply a foam water proofing membrane or solution on your stem wall up to a couple of inches of your above grade ICF walls.
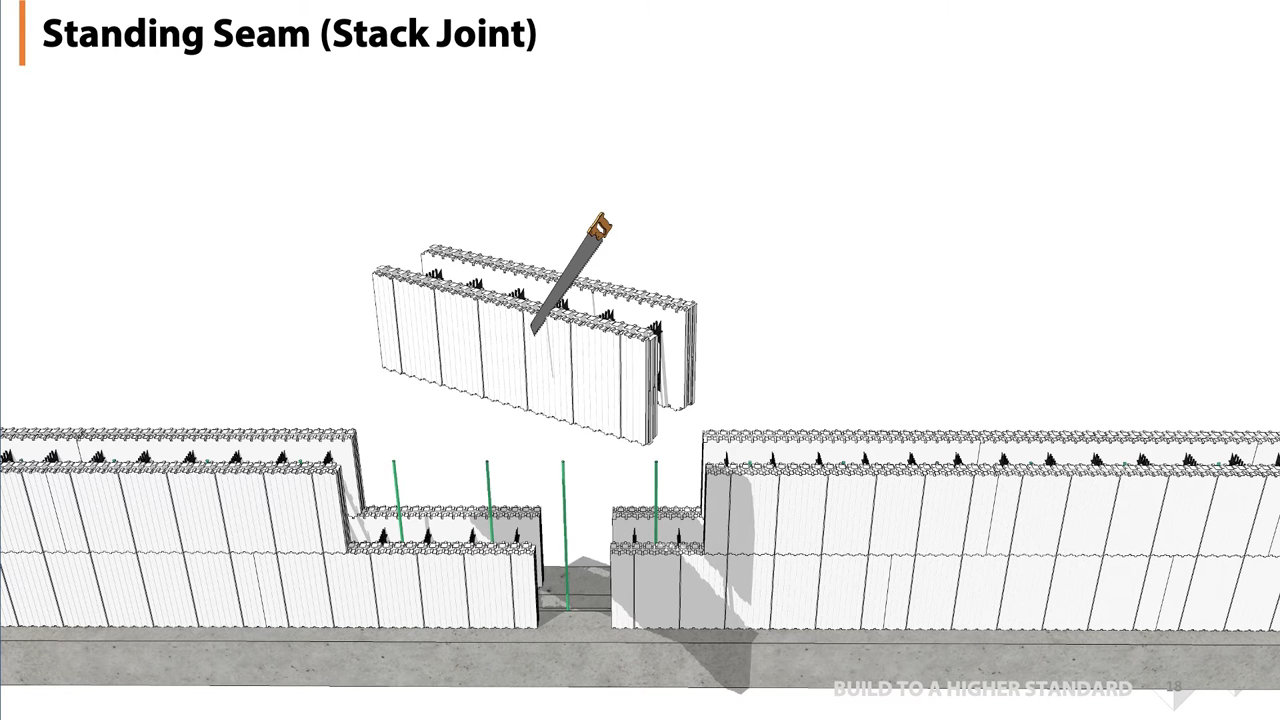
When placing your ICF blocks, it is recommended to start on the corners because it is easier to cut and strap the regular blocks than the L shaped corner blocks.
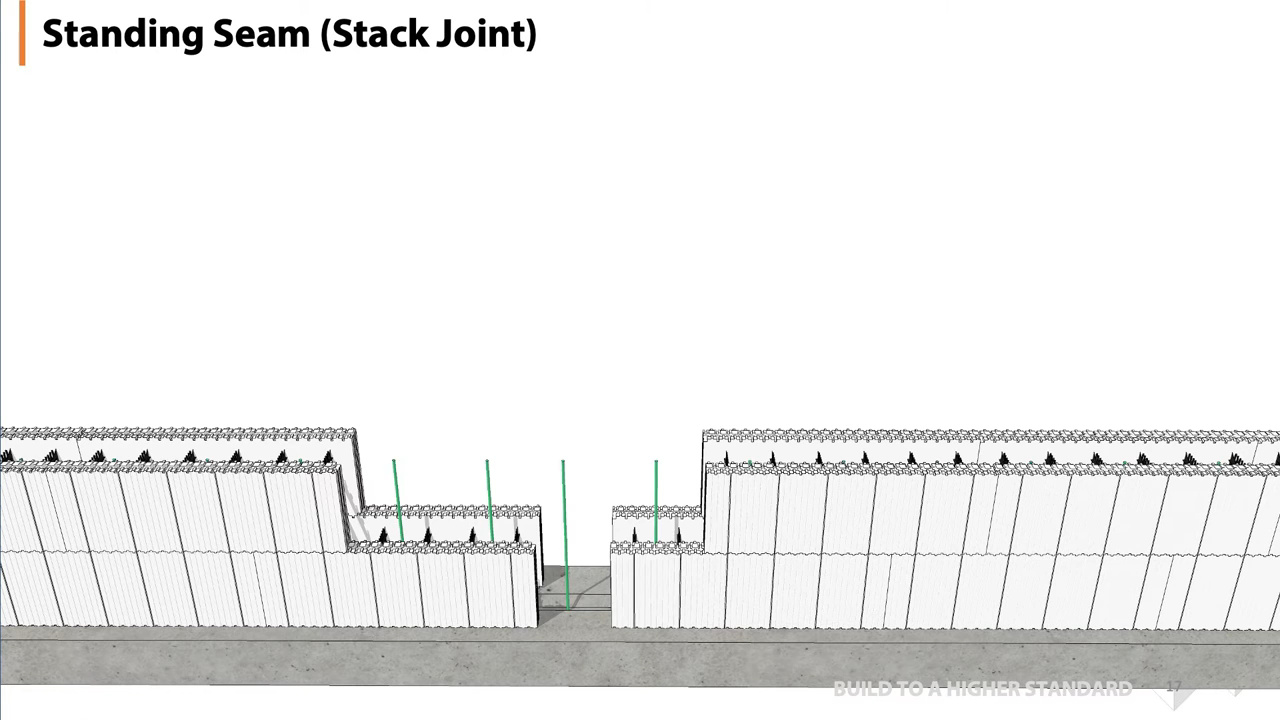
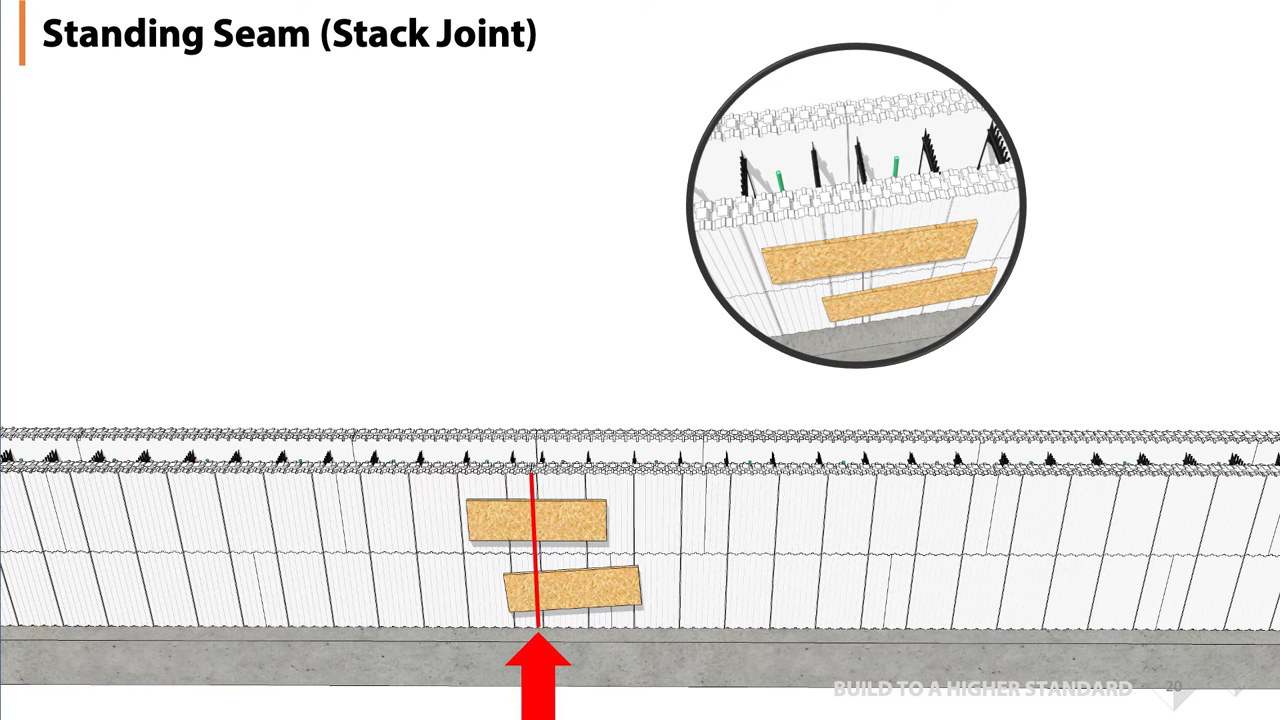
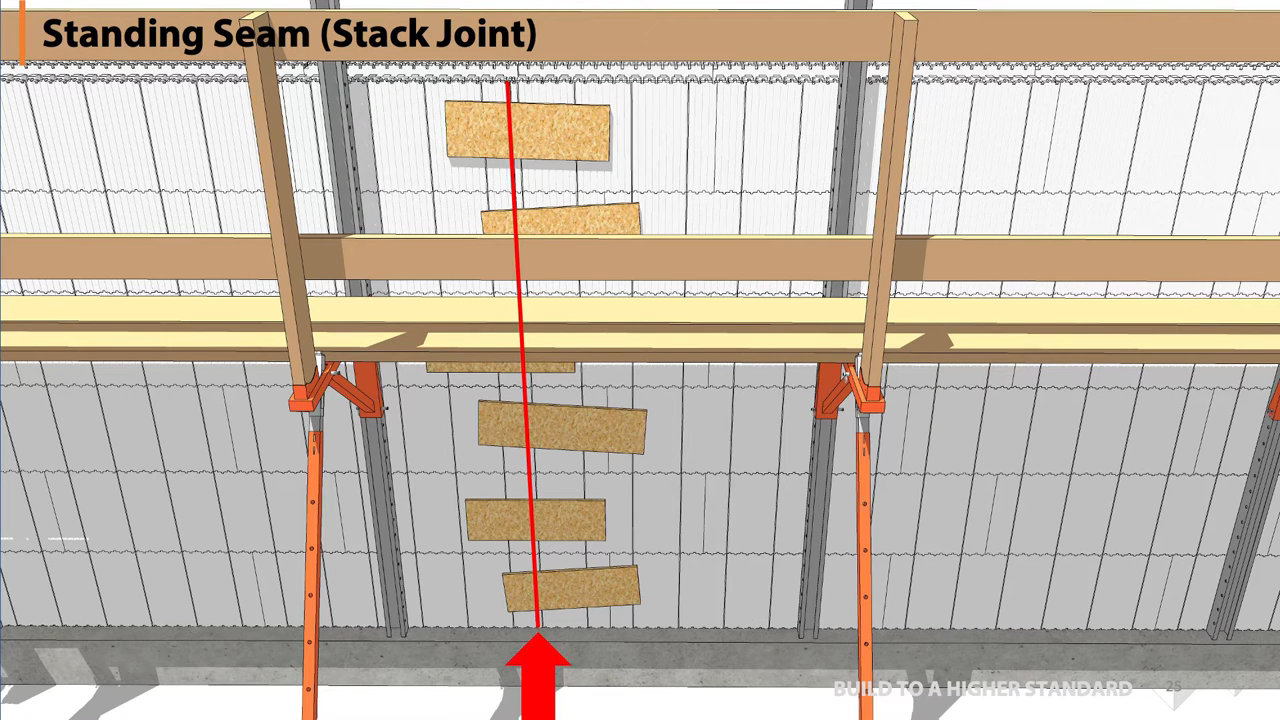
The standing seam or stack joints will be connected by cutting the regular blocks and then strapping the connection with a plank as shown in the next pictures.
To prevent a blow-out when the liquid concrete blows out of your expanded polystyrene EPS forms due to excessive concrete pump pressure, it is ok to cut the pour on the stem wall up to the bottom of your windows, but the next pour schedule should not go beyond two hours for the remainder of the windows and the walls. The standard two-hour window is enough for the first batch to stiffen a bit to prevent a blow-out due to the added stacked weight of the next pour.
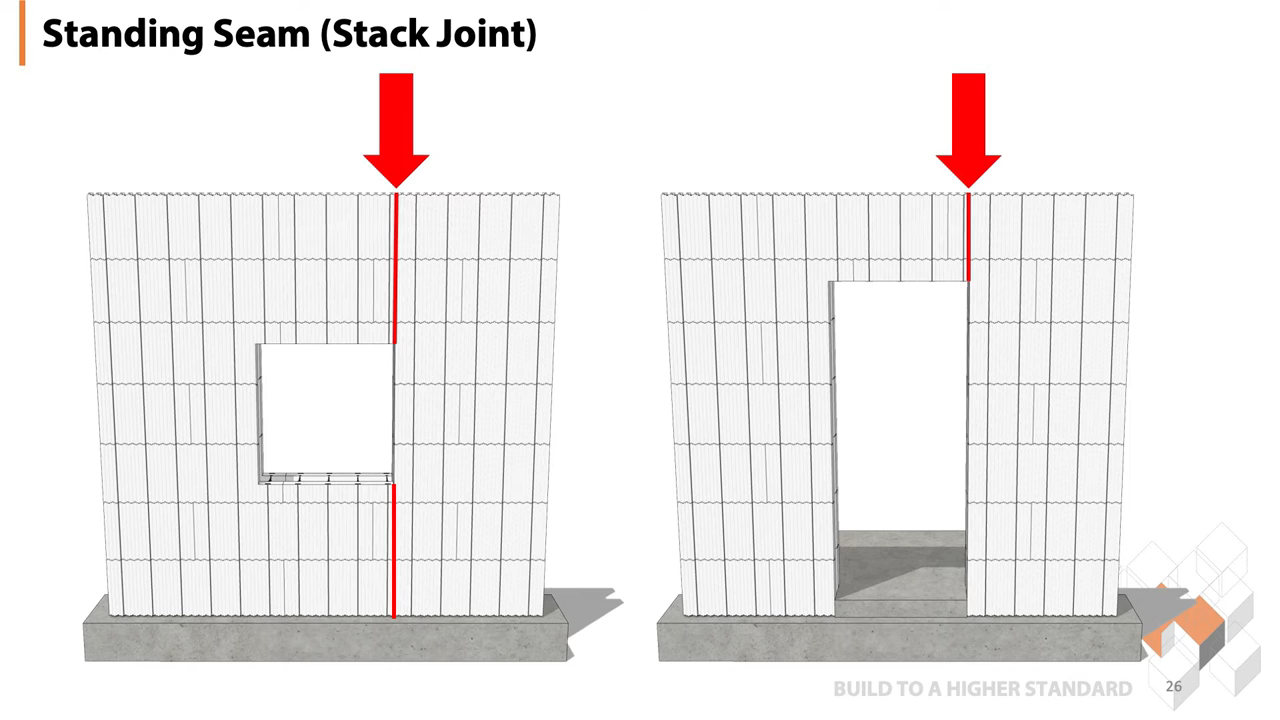
If at all possible, it is better to place your window or door right beside your standing seam to save time on making cut joint pieces if your standing seam is far from the window or door.
You may extend your stem wall all the way to the bottom part of your window so you can cut your pour schedules to prevent a blow-out, but the time between pours should not go beyond the standard two hours. So, your next pour schedule within the two-hour window, will be for all the way up to the top of your wall where you place your floor slab or roof supports.
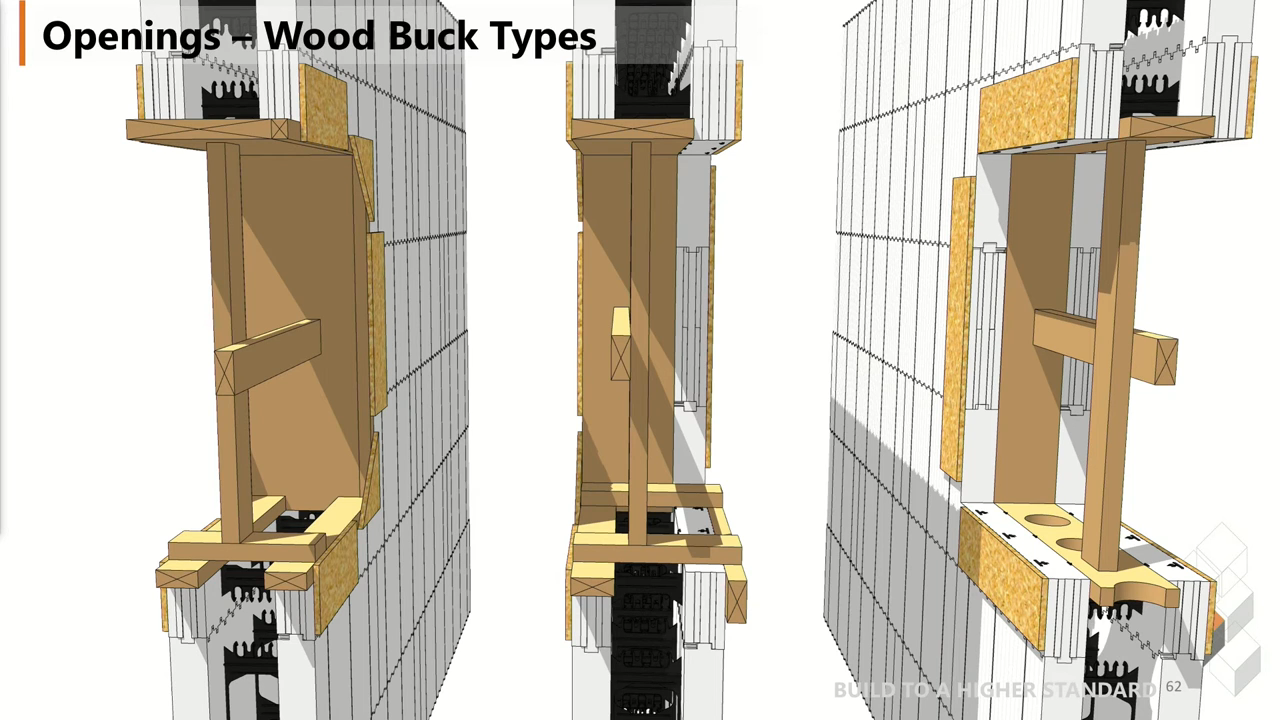
When preparing your window bucks or window jambs, be sure to make an opening on the bottom of the window so you can insert the pencil concrete vibrator and so you can inspect the flow of the pour down that area. It is highly recommended you make a cross support of sticks to support your jambs on all four sides. You may use wood or foam for your window jambs and or door jambs.
Be sure to add external reinforcing planks on your jambs to hold your jambs in place as shown below.
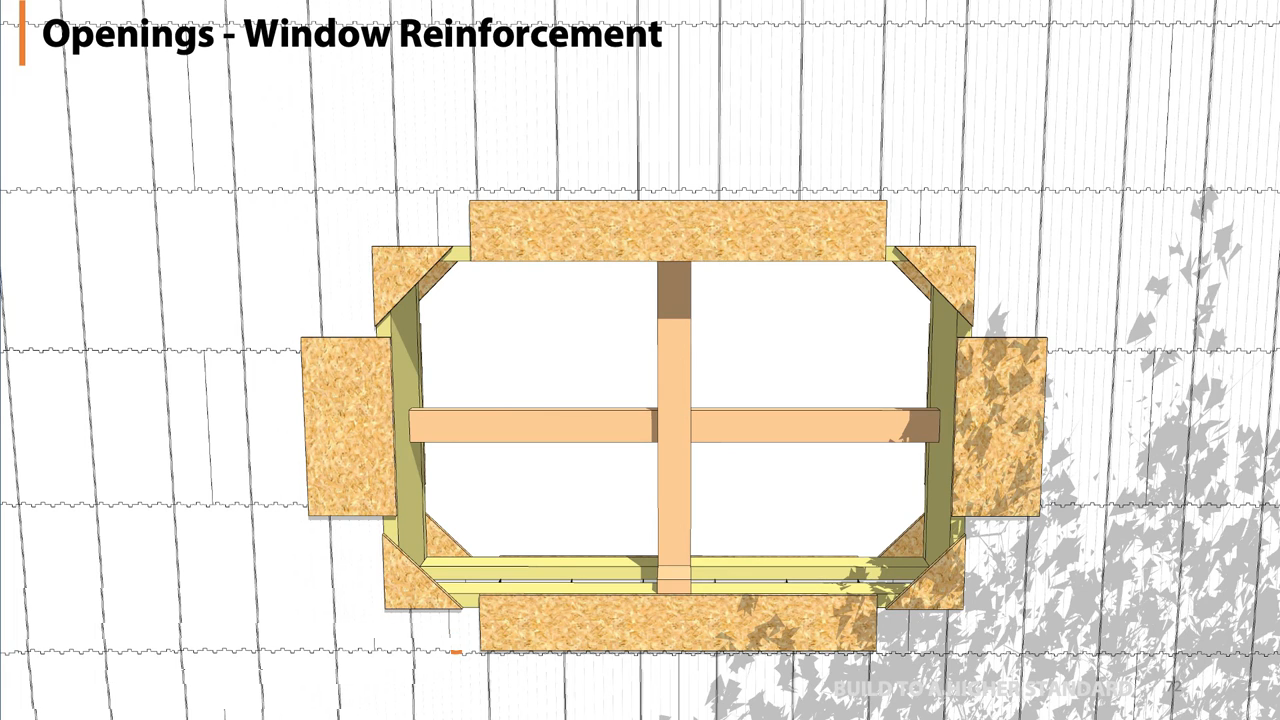
Also, be sure to add twin rebars on all sides of your window jamb as shown below.
As you move up stacking your ICF forms, be sure to add appropriate adjustable bracings to prevent a concrete blow out. Make a multifunction adjustable bracing system that also acts as your scaffold for the guy with the concrete pump end hose who discharges the liquid concrete and for the guy with the concrete vibrator who follows the pour. Such an adjustable bracing scaffold system is shown below.
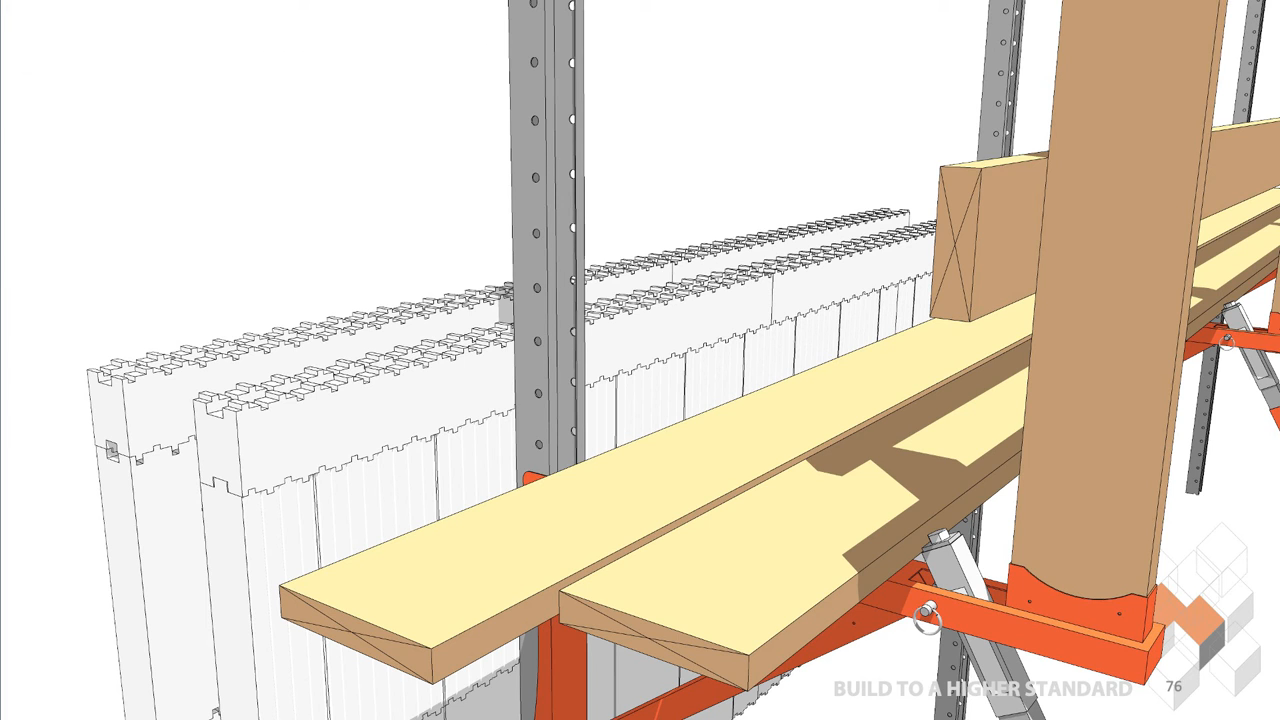
As shown above, the adjustable bracing scaffold must be able to adjust the walls before and after pour to make sure it stays plumbed to line, so your wall stays straight following your string line. So be sure to inspect your wall if it is still following your plumb lines right after the pour while the concrete is still liquid so you can still easily move it to line with your adjustable bracing scaffolds. If your stacked forms do not reach your required wall height, simply cut available ICF blocks to become height adjusters to make up for the missing height material.

1 comment
Thank you for sharing this, it is informative.